Part 1
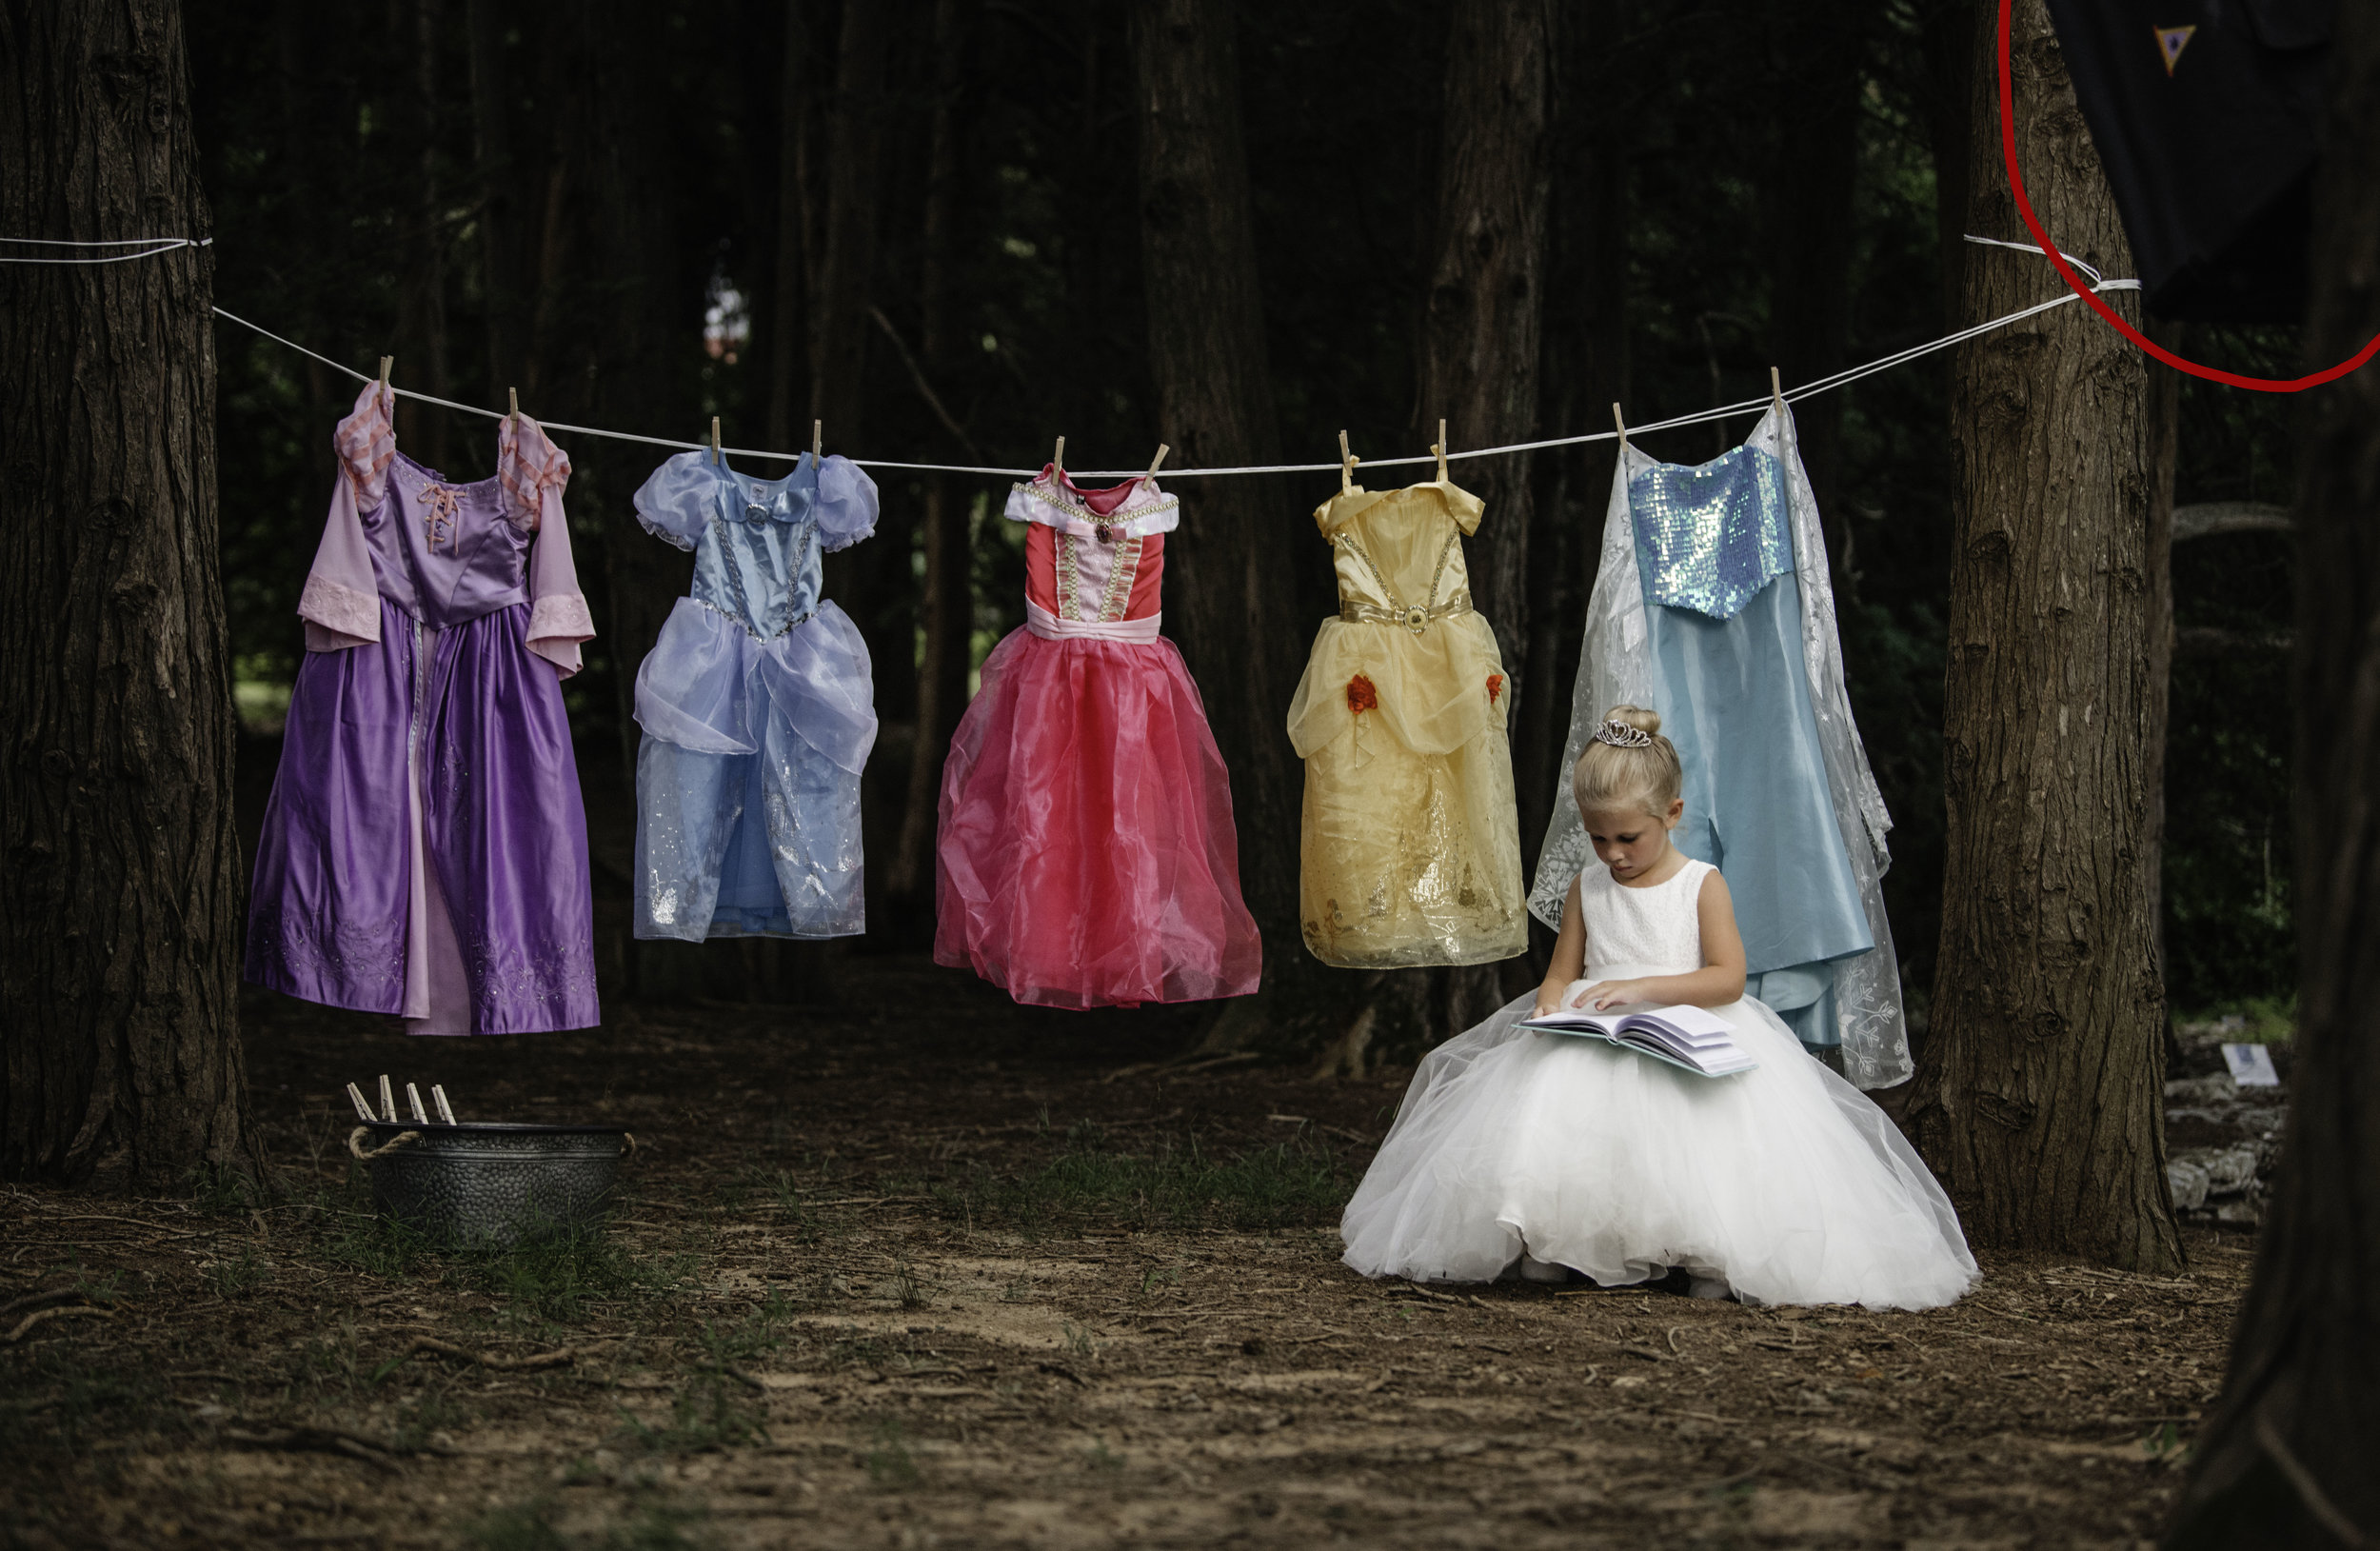
Recently, we did a Disney princess stylized shoot which was a lot of fun. For the first step, we have the basic edits completed such as crop, exposure, and color correction. We went with a more darker tone for this image to give it that enchanted feel! Unfortunately, with some shots, you have to sacrifice some more post work to get the image with that specific look and feel you are going for. As you can see above there are quite a few distractions in the image.
Part 2
The first thing we fix are the big obvious distractions in the image, the softbox to the the right and the small garden sign on the lower right. We use photoshop to quickly fix those distractions. Most times you don’t have a problem removing the items, however the multiple textures near the soft box were problematic but just requires a little more time to perfect it.
The final distraction is more of a judgement call. With our editing style, we generally try to line everything up correctly in the camera and not over edit or alter the image. One of our rules on deciding if something should be removed or not is the eye test. If you first look at an image and your eye is immediately drawn to distraction, then we will generally remove it to keep the integrity of the photo. In the middle left is a building in the distance that we couldn’t help but draw our attention to it, so it had to go.
Part 3
Here is the final image! As you can see the simple edits help achieve the mood and feel we were going for, and the removal of the big distractions only help finish the image while keeping from heavily altering it. We hope everyone could take away a little knowledge from this before and after, as well as getting a look at a few of the steps that are behind the scenes of a beautiful image.


