• Portfolio
  • pricing
  • contact
  • about
  • blog
  • faqs
Jason & Katie Photography
  • Portfolio
  • pricing
  • contact
  • about
  • blog
  • faqs

August Before & After

Part 1

Disney out of camera-1.jpg

Recently, we did a Disney princess stylized shoot which was a lot of fun. For the first step, we have the basic edits completed such as crop, exposure, and color correction. We went with a more darker tone for this image to give it that enchanted feel! Unfortunately, with some shots, you have to sacrifice some more post work to get the image with that specific look and feel you are going for. As you can see above there are quite a few distractions in the image.

Part 2

Disney remove softbox.jpg
Disney remove sign.jpg

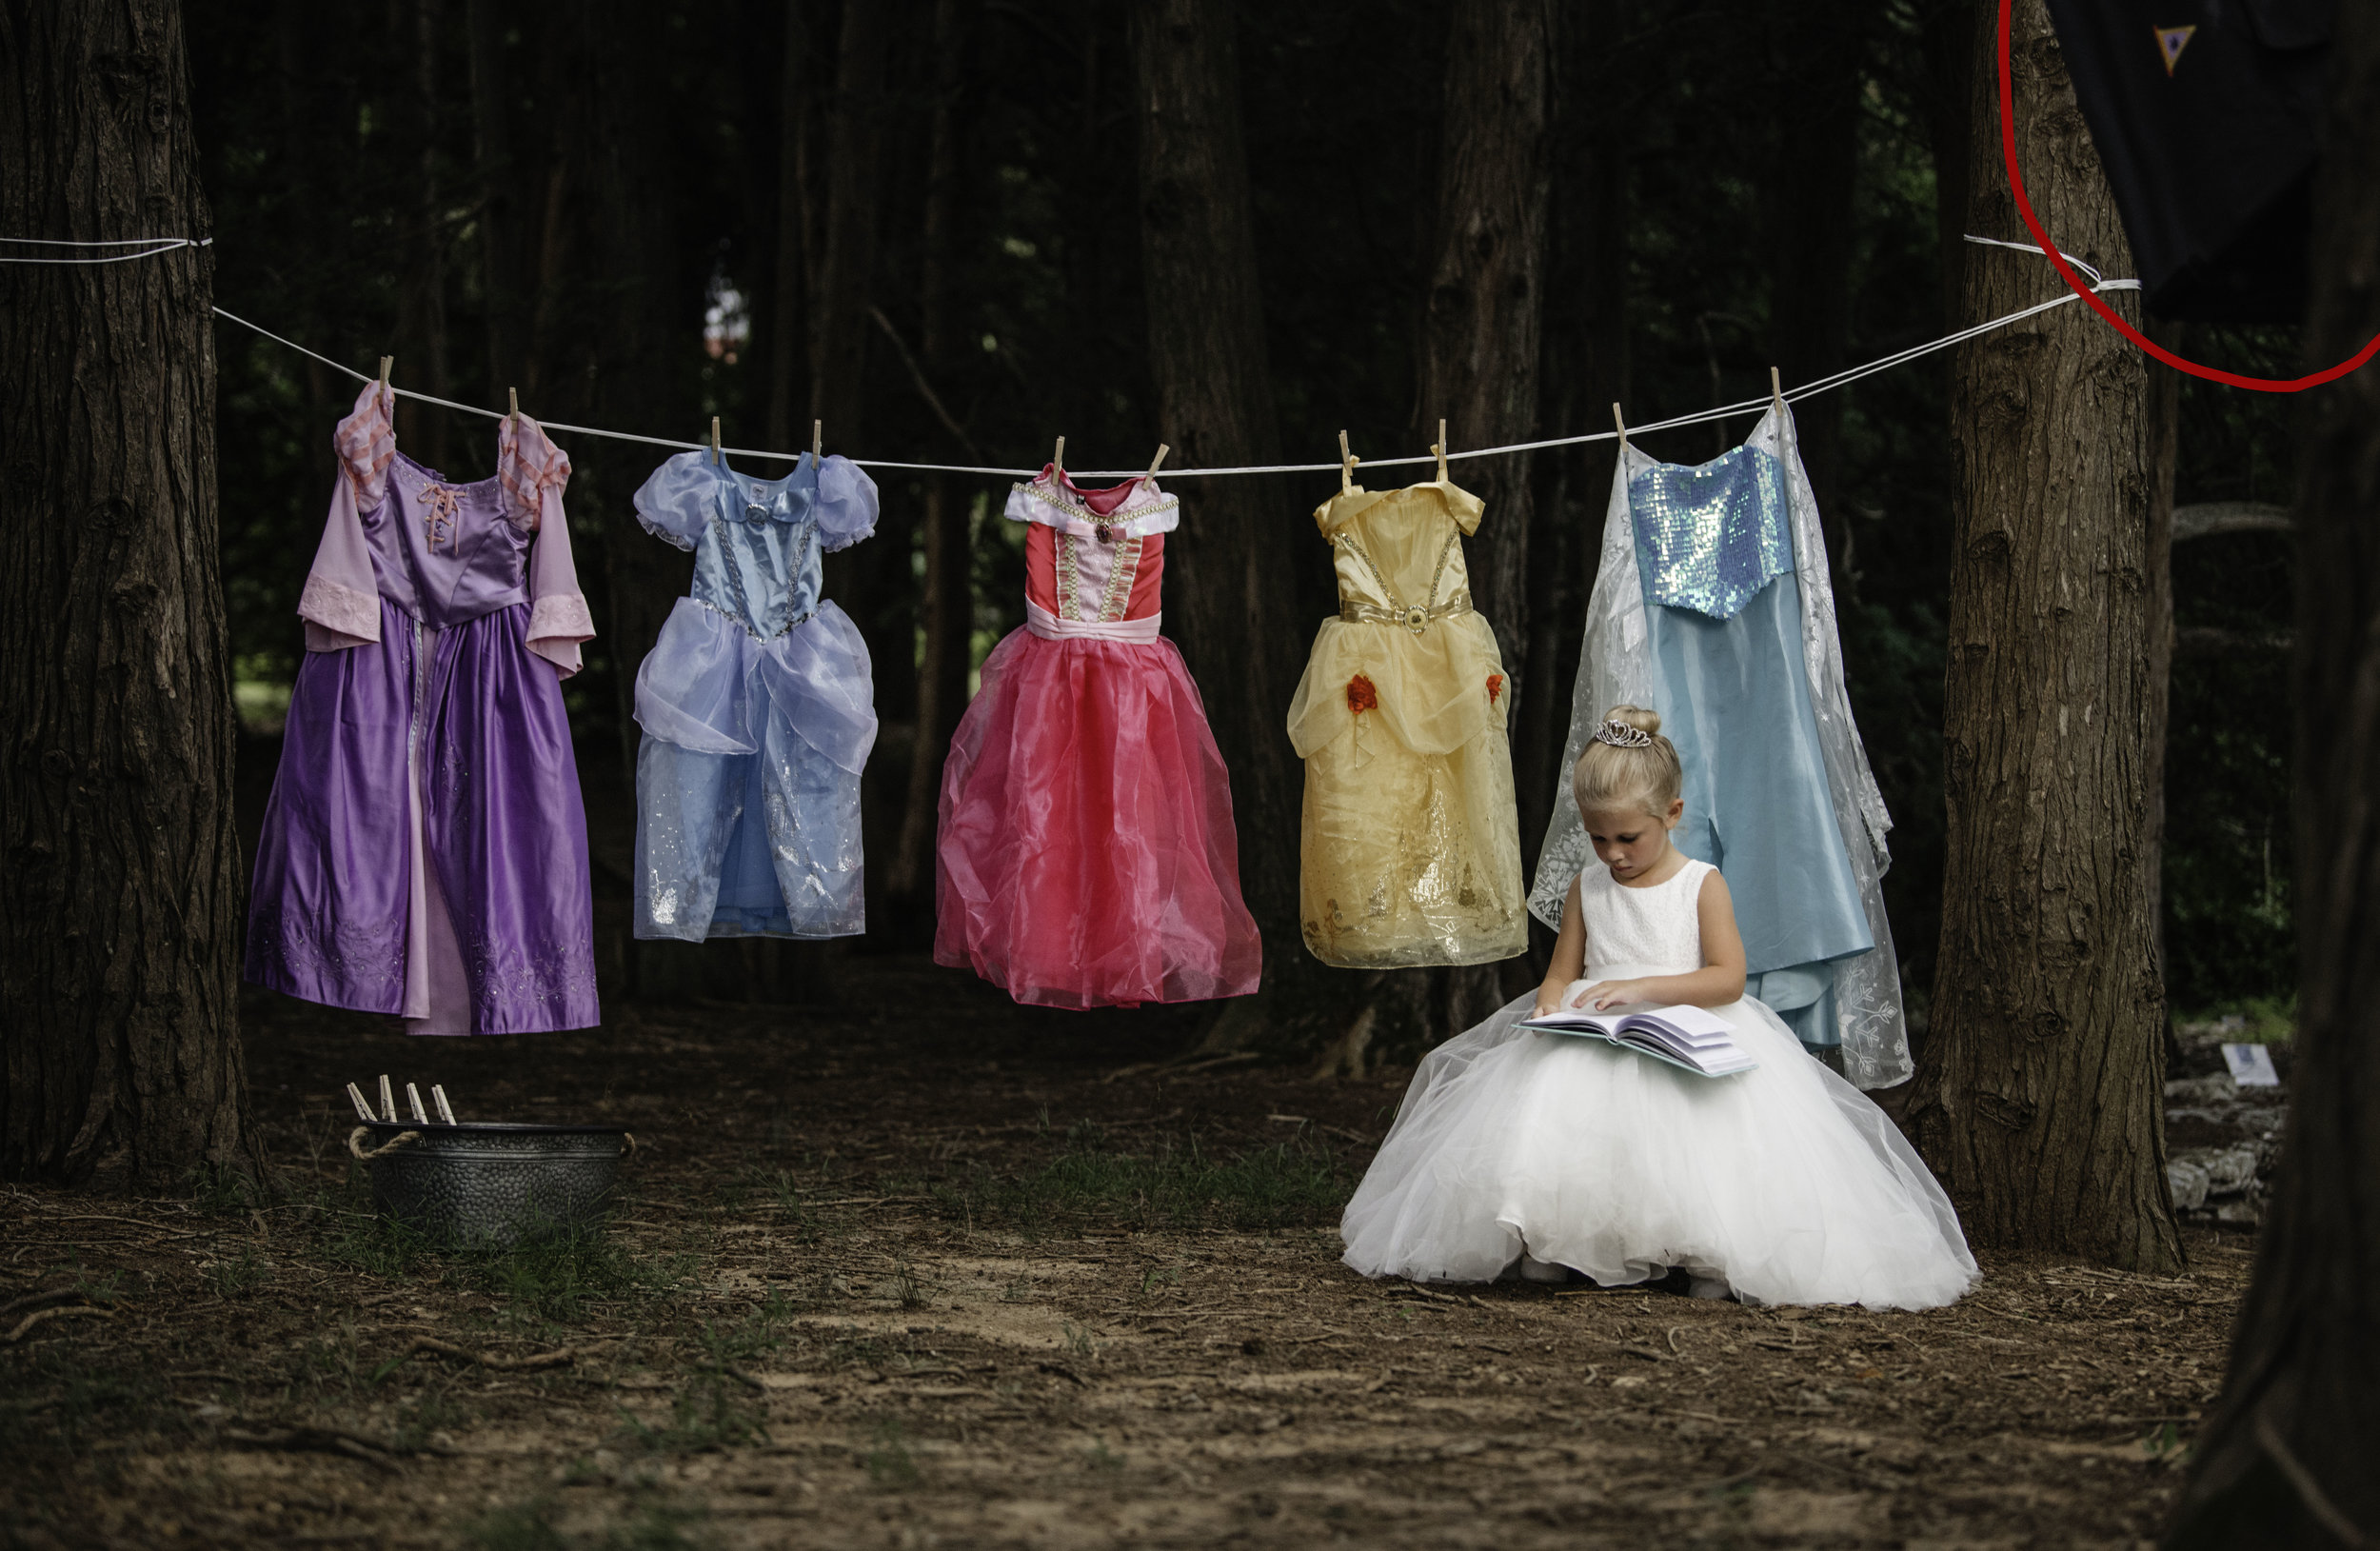
The first thing we fix are the big obvious distractions in the image, the softbox to the the right and the small garden sign on the lower right. We use photoshop to quickly fix those distractions. Most times you don’t have a problem removing the items, however the multiple textures near the soft box were problematic but just requires a little more time to perfect it.

Disney remove house.jpg

The final distraction is more of a judgement call. With our editing style, we generally try to line everything up correctly in the camera and not over edit or alter the image. One of our rules on deciding if something should be removed or not is the eye test. If you first look at an image and your eye is immediately drawn to distraction, then we will generally remove it to keep the integrity of the photo. In the middle left is a building in the distance that we couldn’t help but draw our attention to it, so it had to go.

Part 3

disney finished.jpg

Here is the final image! As you can see the simple edits help achieve the mood and feel we were going for, and the removal of the big distractions only help finish the image while keeping from heavily altering it. We hope everyone could take away a little knowledge from this before and after, as well as getting a look at a few of the steps that are behind the scenes of a beautiful image.

tags: Jason and Katie photography, photography editing tips, photography, disney, disney princess, photo editing, photo editing tips, before and after, photo before and after
categories: Photography
Thursday 08.29.19
Posted by Jason Dingus
 

July Before & After Photo

danielle test part-1 sized.jpg
Danielle finished sized.jpg

Recently, we’ve been asked a lot about our editing style and some of the steps it takes to get our images to their finished look. After a little discussion, Katie and I have decided to start a monthly before and after section of our blog discussing just that. Unless we’re shooting for a particular creative session our style is more reserved, as we prefer to showcase our clients for who they are without drastic editing to maintain that personal and authentic feel for each image. We are definitely excited to give a small glimpse into some of our choices and work that goes into each of our images and hope both professionals and clients enjoy this little inside look at editing with Jason & Katie Photography.


Part 1

danielle test part-1 sized.jpg
danielle test part-2 sized.jpg

For each photo, the very first thing we do is make minor crops and adjust for the proper color temperature. As you can see, we tightened up on the couple and left more negative space above. As a result, the couple has become more pronounced in the photo allowing for more of an “up close” feel and you can see their reactions much better which can easily get lost in those large images. The adjusted crop also lets a wandering eye go to the gorgeous trees above them which allows for that big encompassing feel that puts this couple into a bigger than life look.


Part 2

danielle test part-2 sized.jpg
danielle test part-3 sized.jpg

The second step is where more of the tiny details com into play which helps the picture pop more. The shadows are boosted just a little to give the wood bark more texture as well as an airy feel to the branches around them. It’s important with encompassing photos to highlight the details of the scenery or it becomes just… blah, for a lack of a better word. Adding some to the highlights also gives the branches a lighter green tone and making sure they don’t disappear into the shadows.


Part 3

danielle test part-3 sized.jpg

Finally, we make a small adjustment to the overall exposure of the photo making sure that it is completely balanced with all of the previous changes we made. A final small scan of the photo is made to make sure we get rid of any problems, such as the big black soft box to the right! Each of the changes may seem small or unimportant but ultimately, they work together to create that polished image that fits the look you envisioned. Always spend the time to think out a photo even before you snap the button! You will be guaranteed to have a gorgeous image every time.

tags: before and after, photography, photography editing tips, photography tips, editing photos, Jason and Katie photography, va photographers, brandy farms
categories: Photography
Thursday 07.25.19
Posted by Jason Dingus
 

Powered by Squarespace.